How To Print Banners On A Konica Minolta MFP

Step One: Putting the MFP into banner mode
In order to print banners, the MFP has to be put into ‘Banner Printing Mode’. This option is selected via the panel of the MFP as follows.
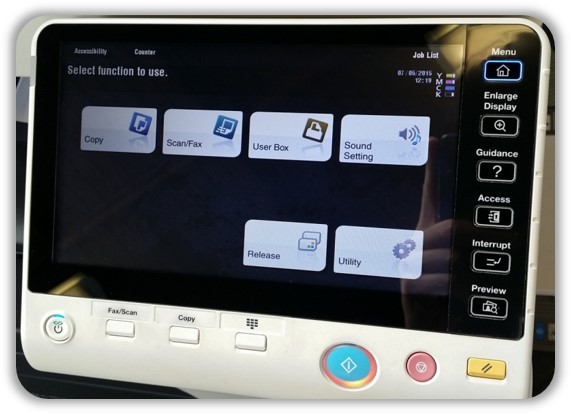
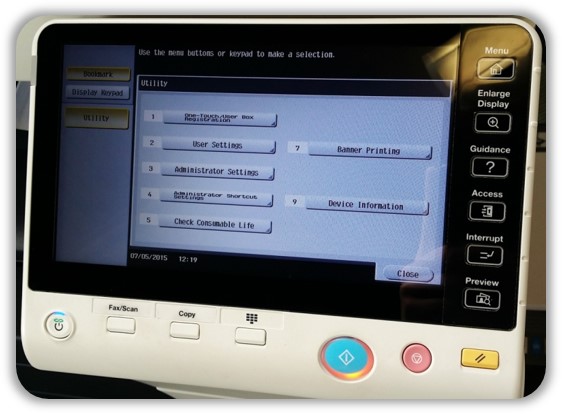
Press the ‘Menu’ button located on the right hand side of the panel, then press the ‘Utility’ button located at the bottom right of the screen.
Press ‘Banner Printing’, then select ‘Allow’ and then ‘OK’.
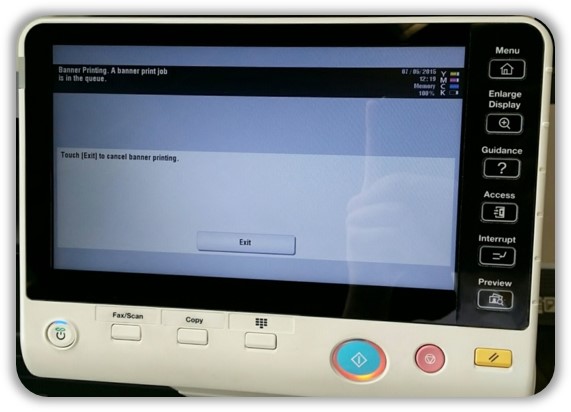
The screen will now indicate that Banner Printing Mode has been enabled and the MFP is now ready to be sent a banner print.
Please note that while Banner Printing Mode is active the MFP can only process banner print jobs.

Step Two: Setting up the printer driver
Now the MFP is in Banner Printing Mode, you will need to send the Banner print job to the device.
At your PC, open the banner document and go to print it. Once the printing window opens select ‘Properties’
On the initial ‘My Tab’ screen press the drop down menu for ‘Original Size’.
Scroll through the drop down menu to the bottom and select ‘Custom Size’.
Upon selecting ‘Custom Size’ from the drop down menu, a new window will open. The dimensions of the banner paper must be entered into the width and length boxes. Banner Paper is 297mm x 1200mm. Select ‘OK’ once done.
Once ‘OK’ is selected another window will pop up. The print driver is automatically changing the paper tray to the bypass tray and setting the paper type to Thick1+. Select ‘Yes’.
To confirm all of these settings, press ‘OK’.
Once you are ready to print select ‘Print’.

Step Three: Loading the paper
Now the print driver is set up and the MFP is in Banner Printing Mode, we are ready to load the paper and print.
The Banner paper must be fed into the bypass tray. Please ensure the paper sits straight in order to eliminate any skew.
Make sure the banner paper is supported as it is fed into the MFP.
At the device, press ‘Complete’ when you are ready to print onto the banner paper. The MFP will now take the paper and print the banner.
Please make sure to exit Banner Printing Mode when you are finished via the ‘exit’ button on the MFP screen.
